AUDIO SETTING TUTORIAL
Open Windows Control Panel and Find Sound Controls
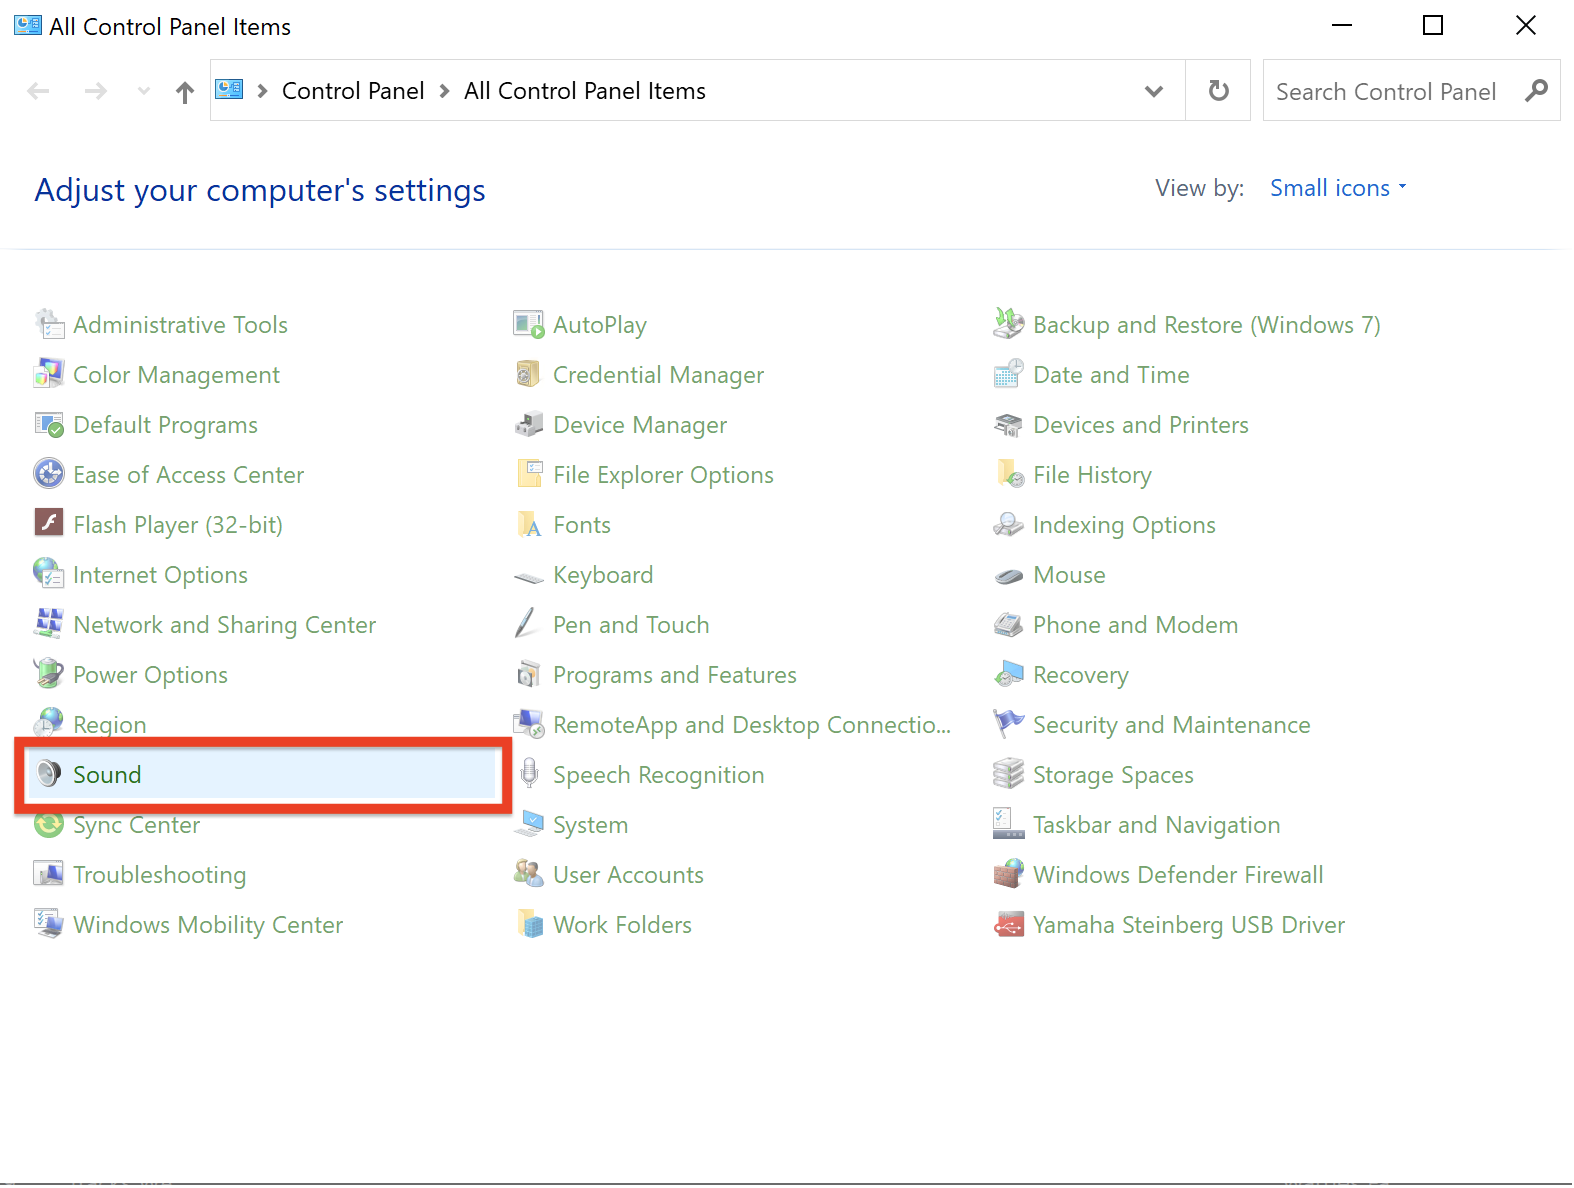
STEP 1
Use the Windows Audio Sound Control Panel for your setup. For this to work, each audio device on your PC needs to be set to the same sample rate and bit depth. Start by opening the Windows “Control Panel” and selecting “Sound” to open the Sound Control Panel.
Open Playback Settings tab
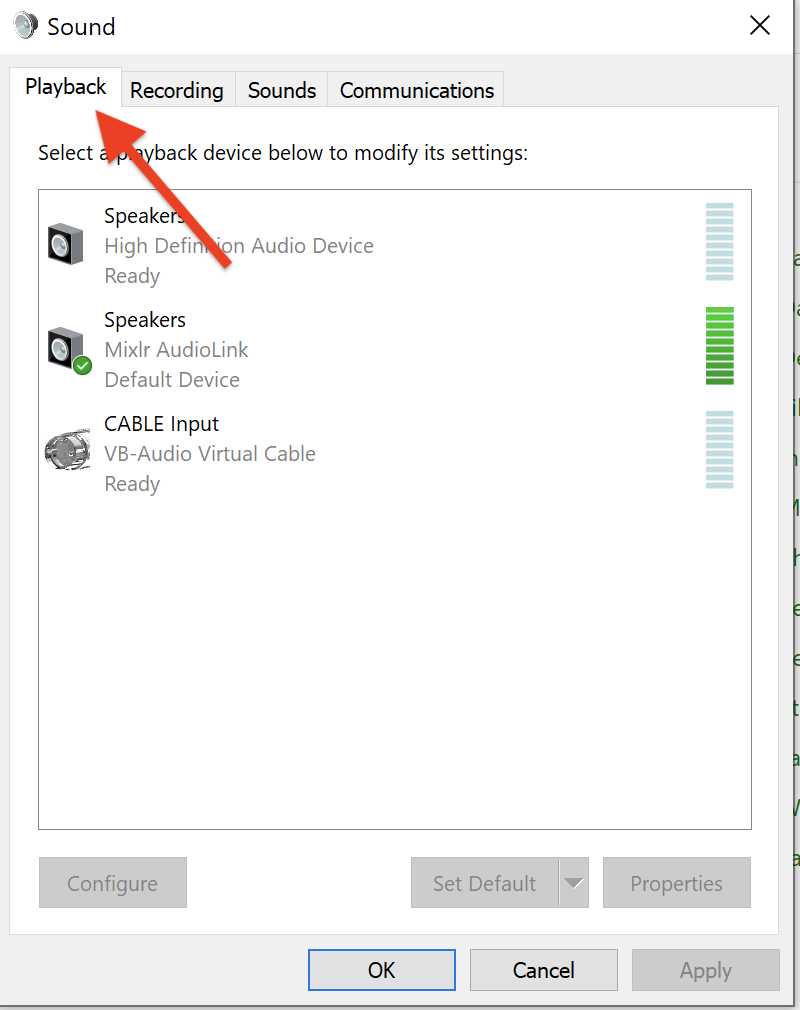
STEP 2
The Sound Control Panel will reveal the playback AND recording device tabs. Begin with the Playback device tab. The active (default) sound device will have a green check box next to the name of the device.
Adjust Playback settings for MixLR speakers
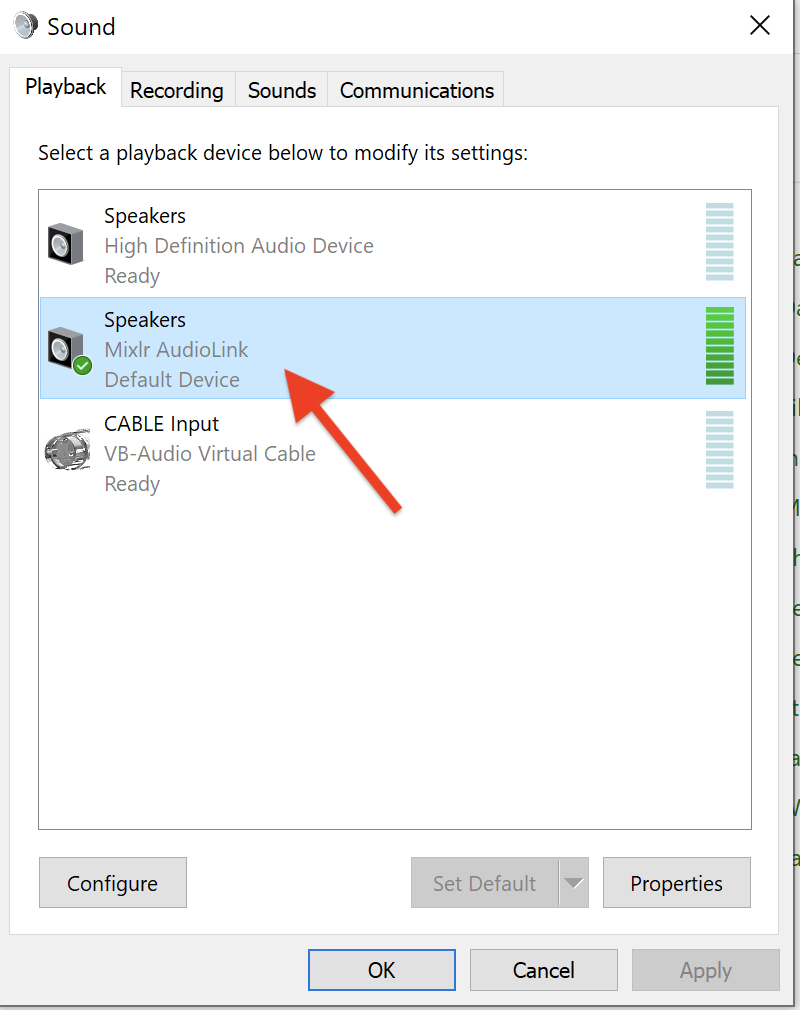
STEP 3a
You will see a new audio device called “Mixlr AudioLink”. This is the FireWav sound driver.
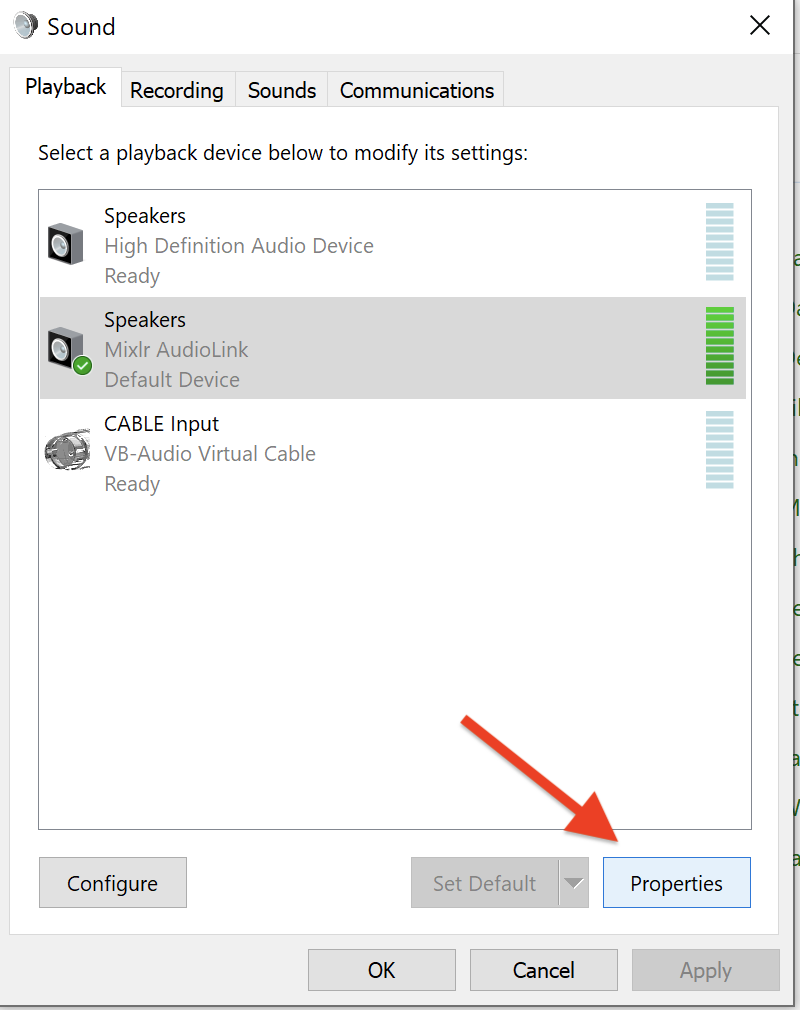
STEP 3b
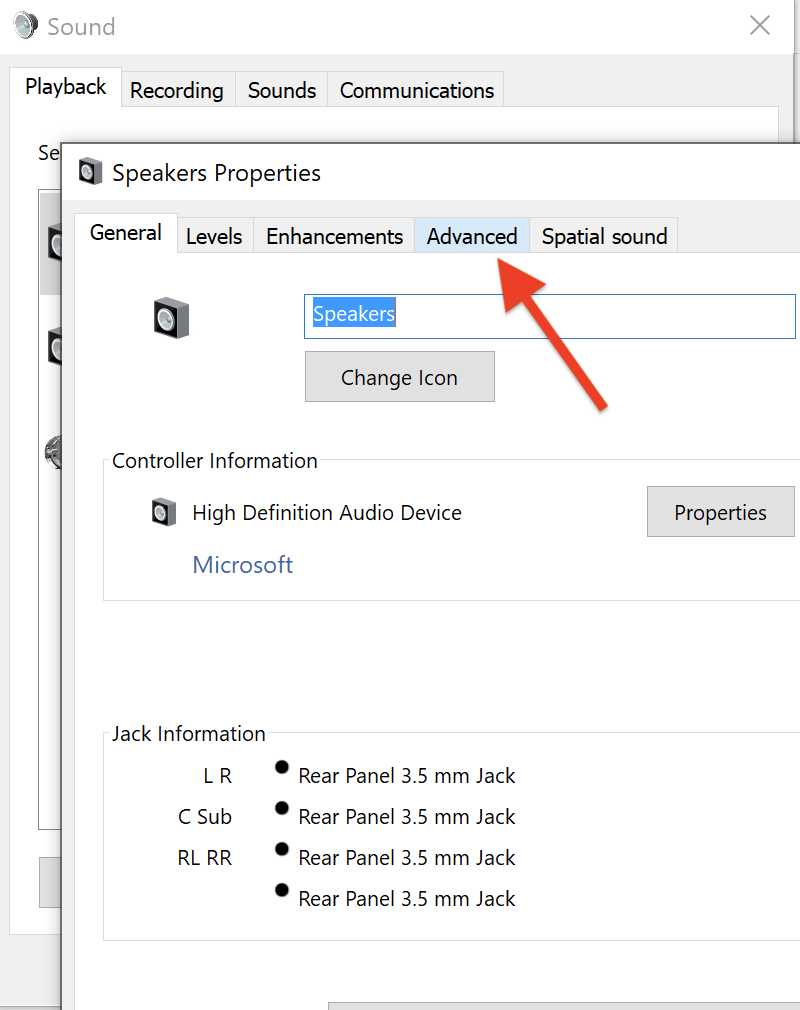
Select Properties
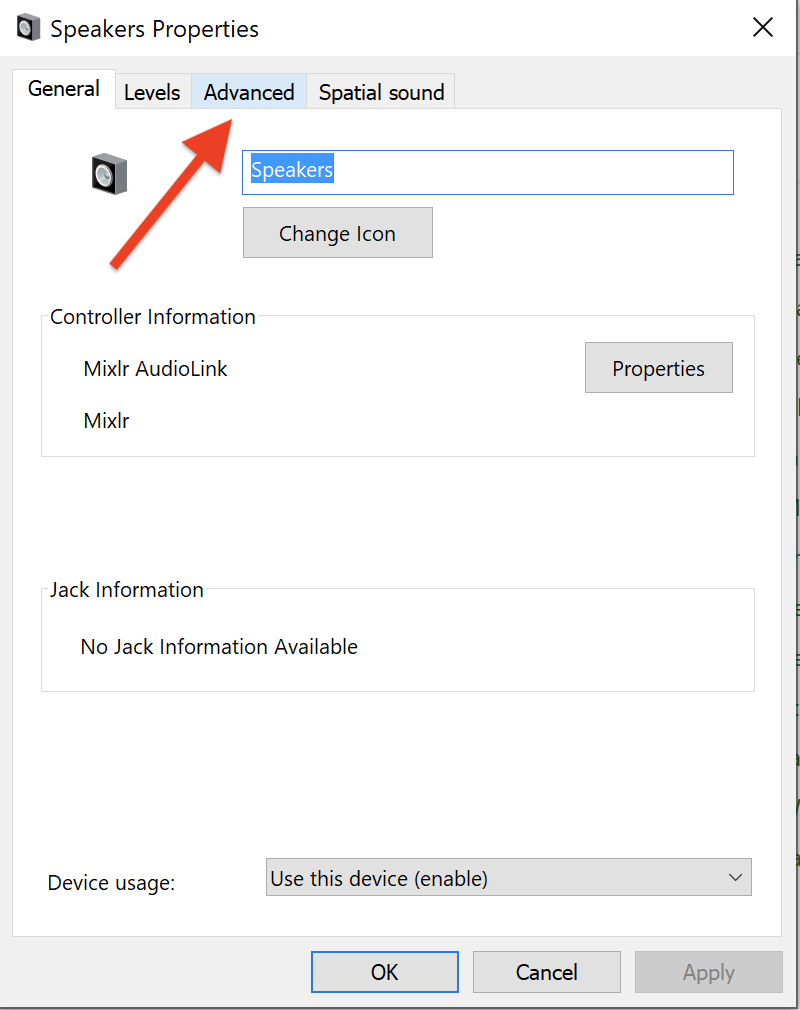
STEP 3c
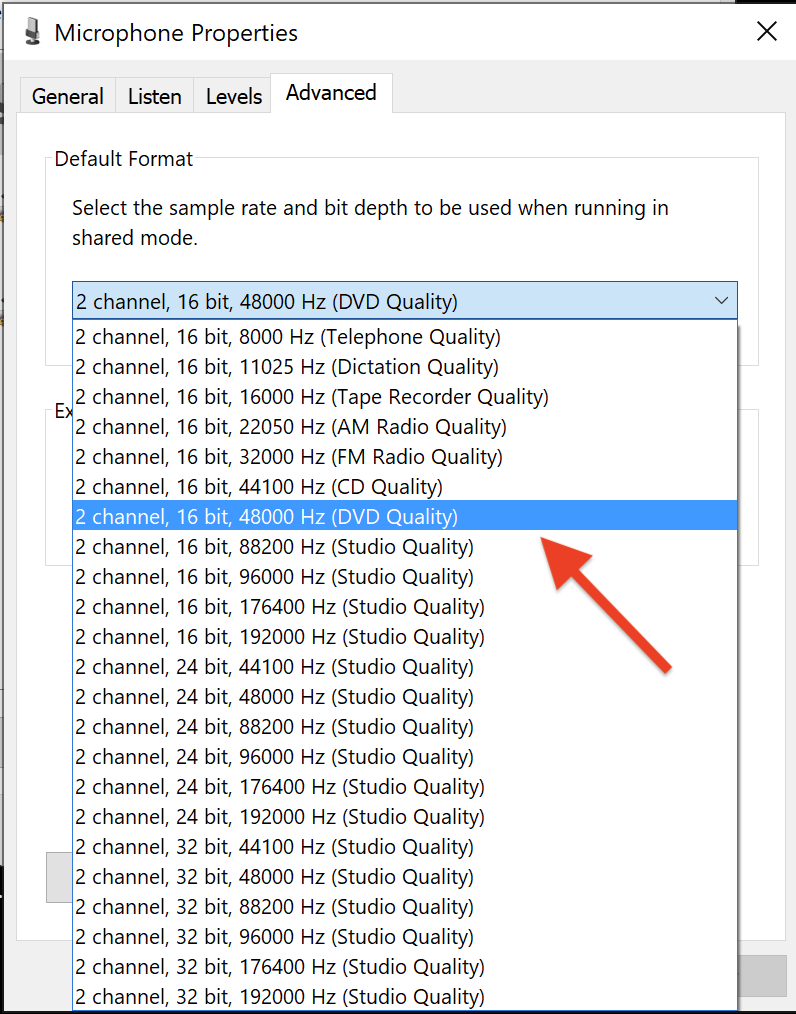
In the properties window, select the “Advanced” tab.
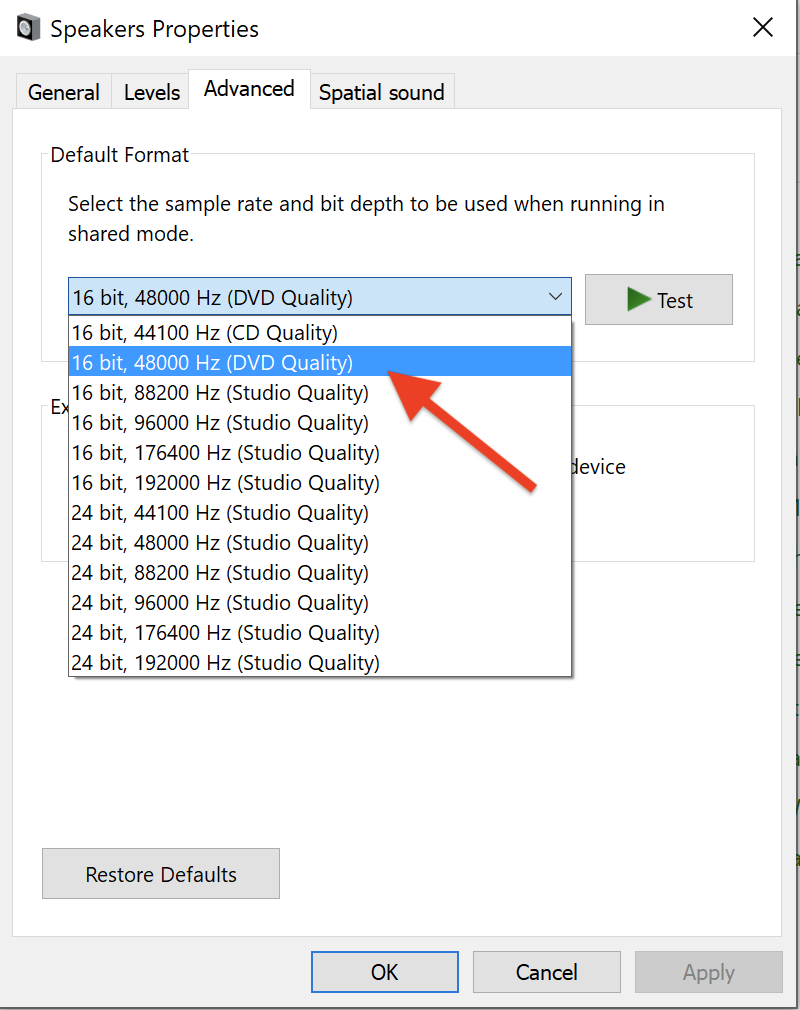
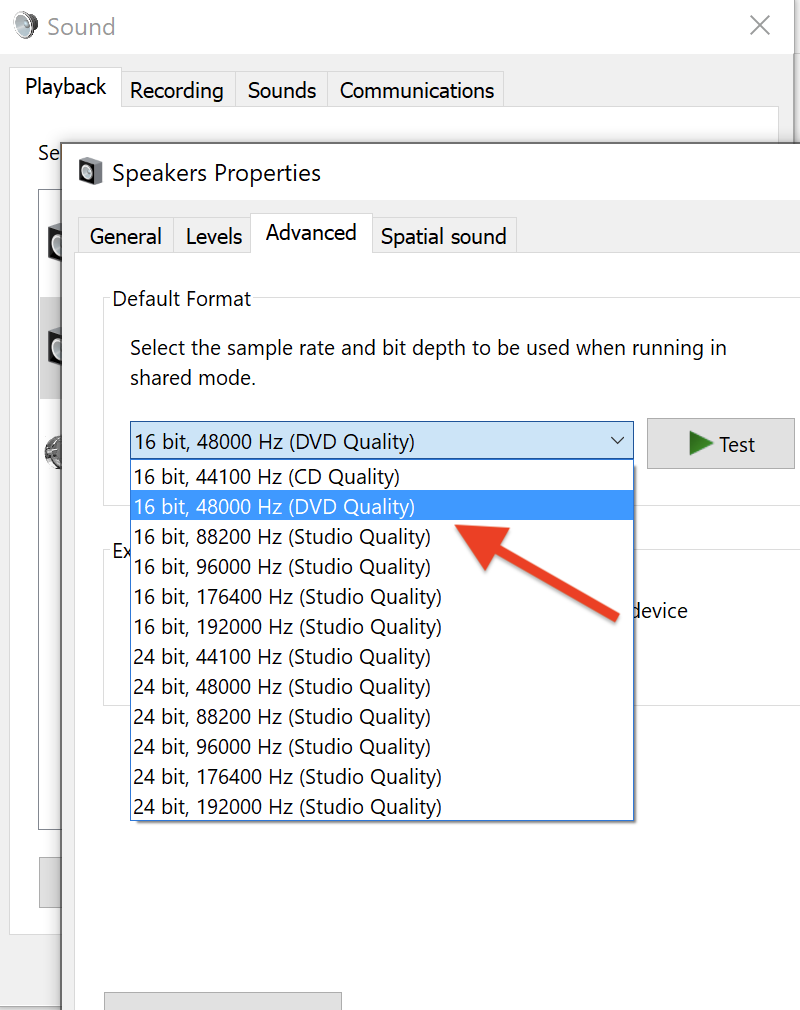
STEP 3d
From the list of available sample rates and bit depths, select “16 bit, 48000 Hz (DVD Quality)”.
Adjust Playback settings for High Definition Audio Device Speakers (or system default)
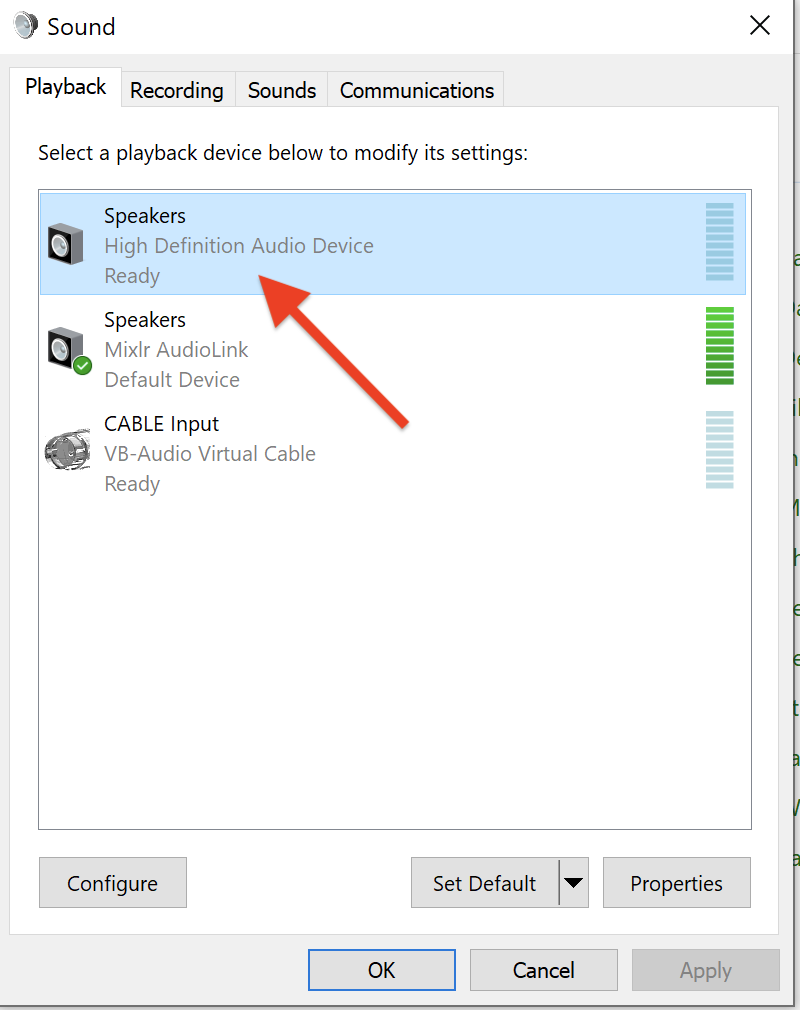
STEP 4a
Select “High Definition Audio Device Speakers” from the list of Playback devices.
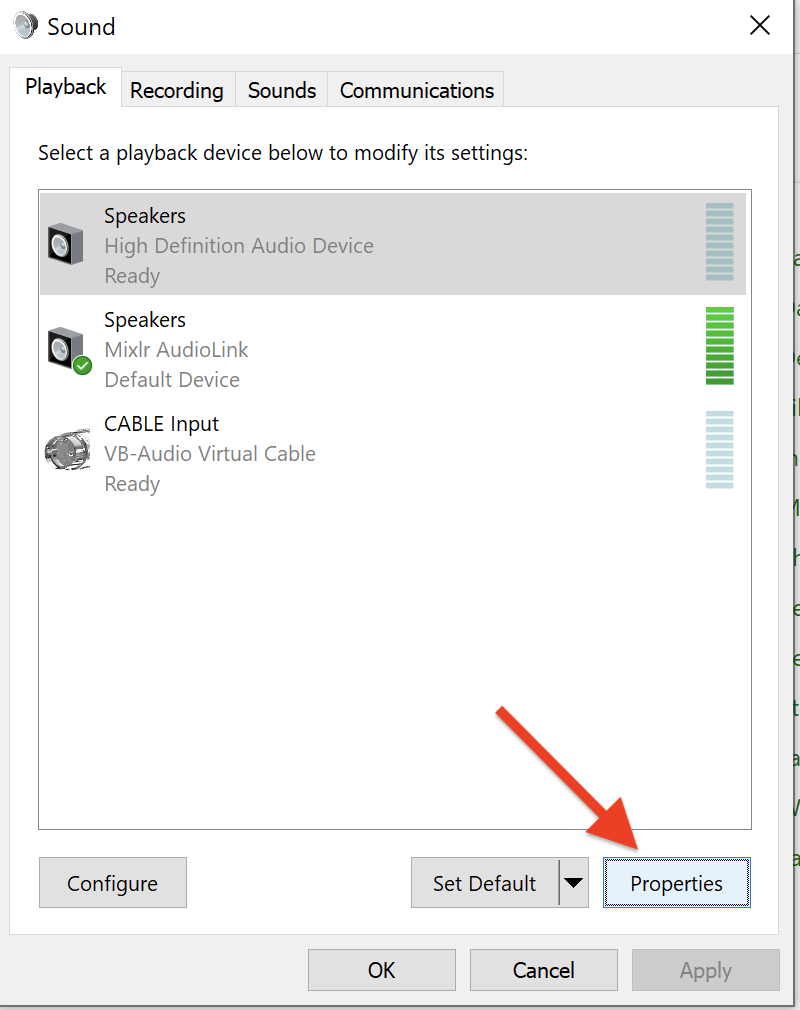
STEP 4b
Select Properties
STEP 4c
In the properties window, select the “Advanced” tab.

STEP 4d
Click on the drop down arrow to reveal sample rate and bit depth options.
STEP 4e
From the list of available sample rates and bit depths, select “16 bit, 48000 Hz (DVD Quality)”.
Move to Recording Settings tab
STEP 5
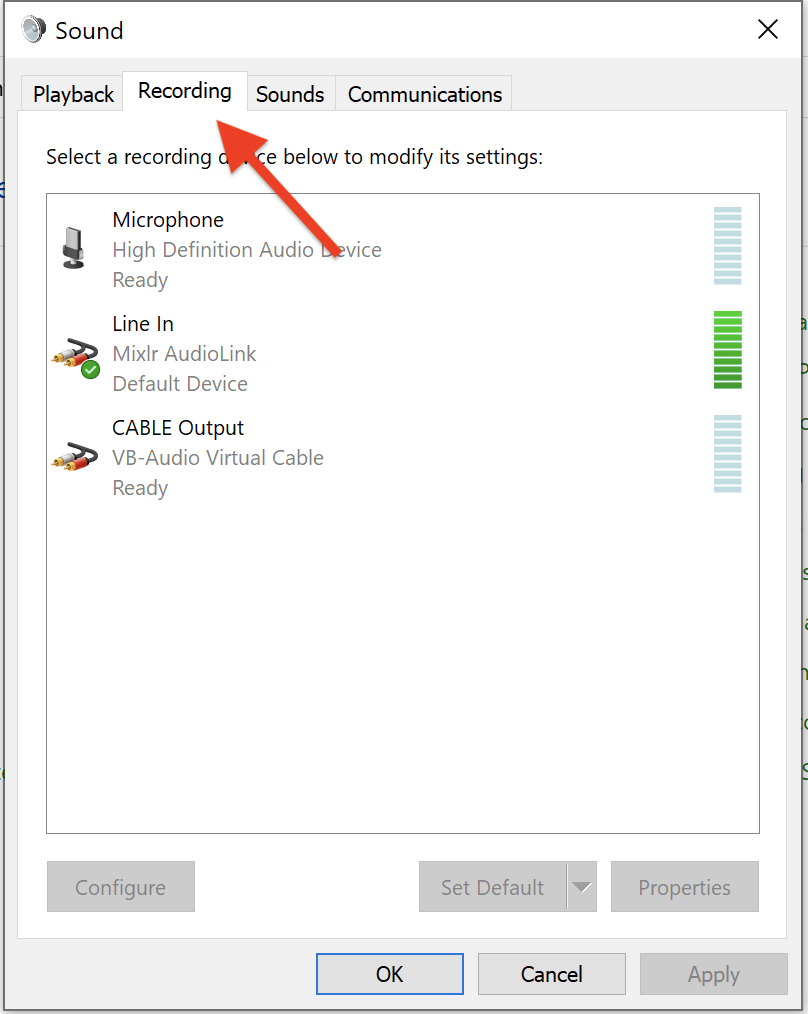
Now that the playback devices are set to the same sample rate and bit depth, the Recording devices need to be matched. Go to the sound control panel window and select the Recording tab.
Adjust Recording settings for line in MixLR
STEP 6a
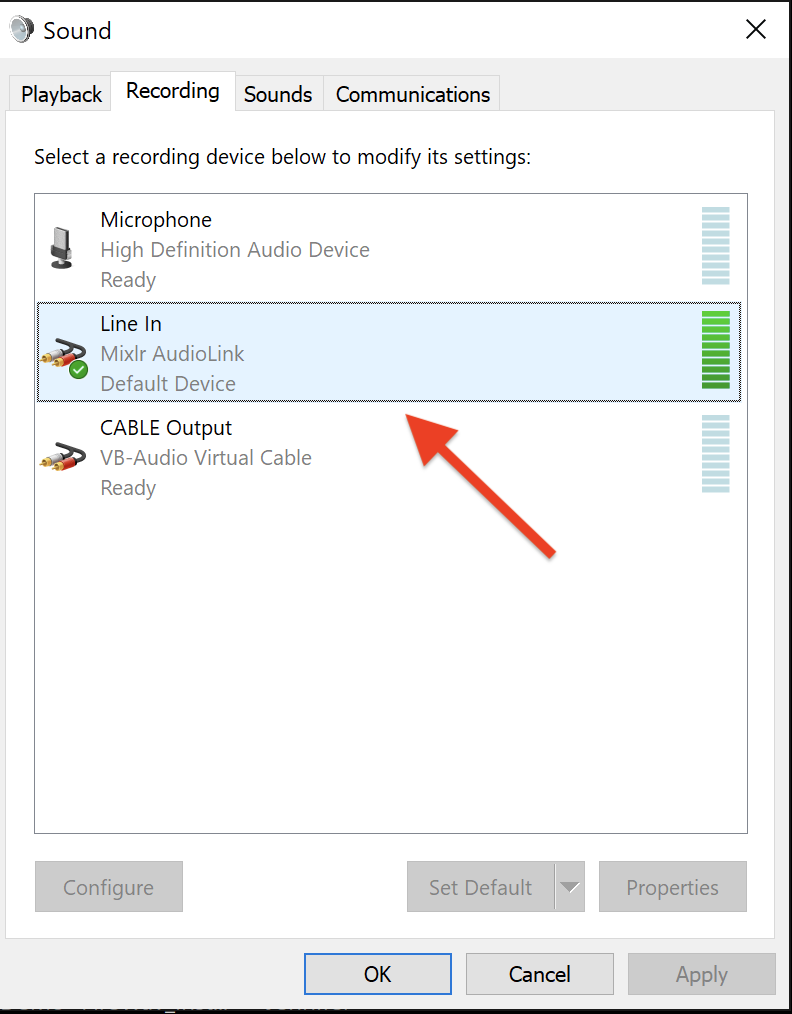
Once again, the active device will be indicated by a green check box and a NEW recording device called Line In – Mixlr AudioLink will be listed.
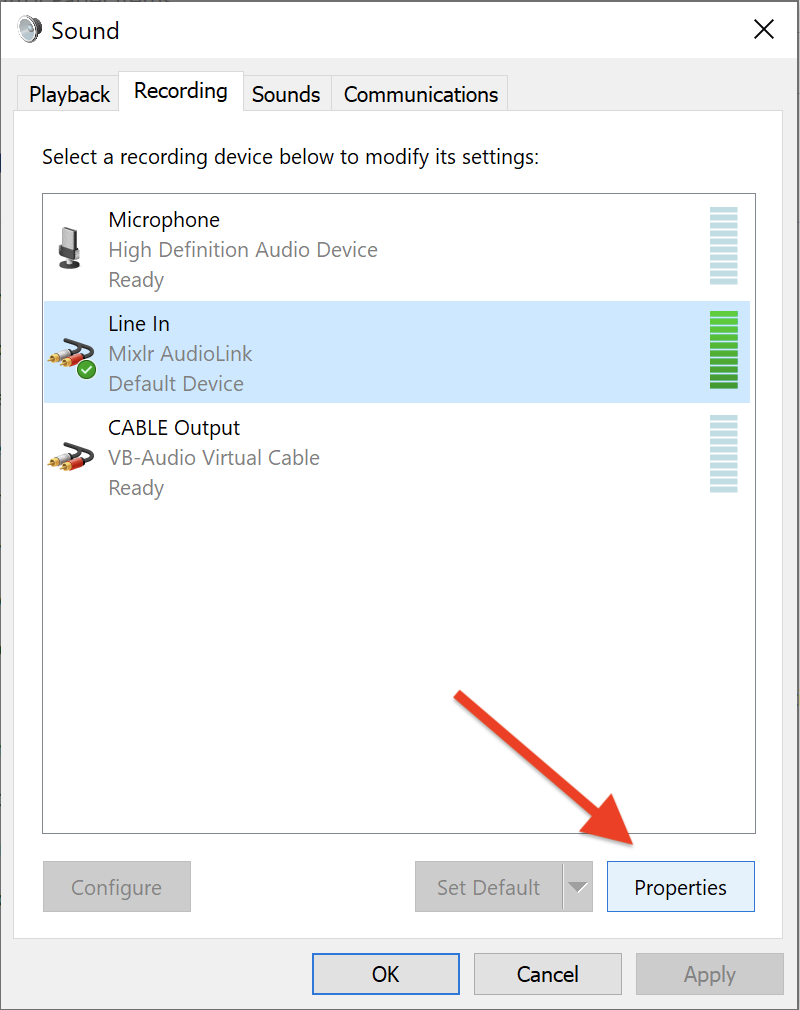
STEP 6b
Select Properties
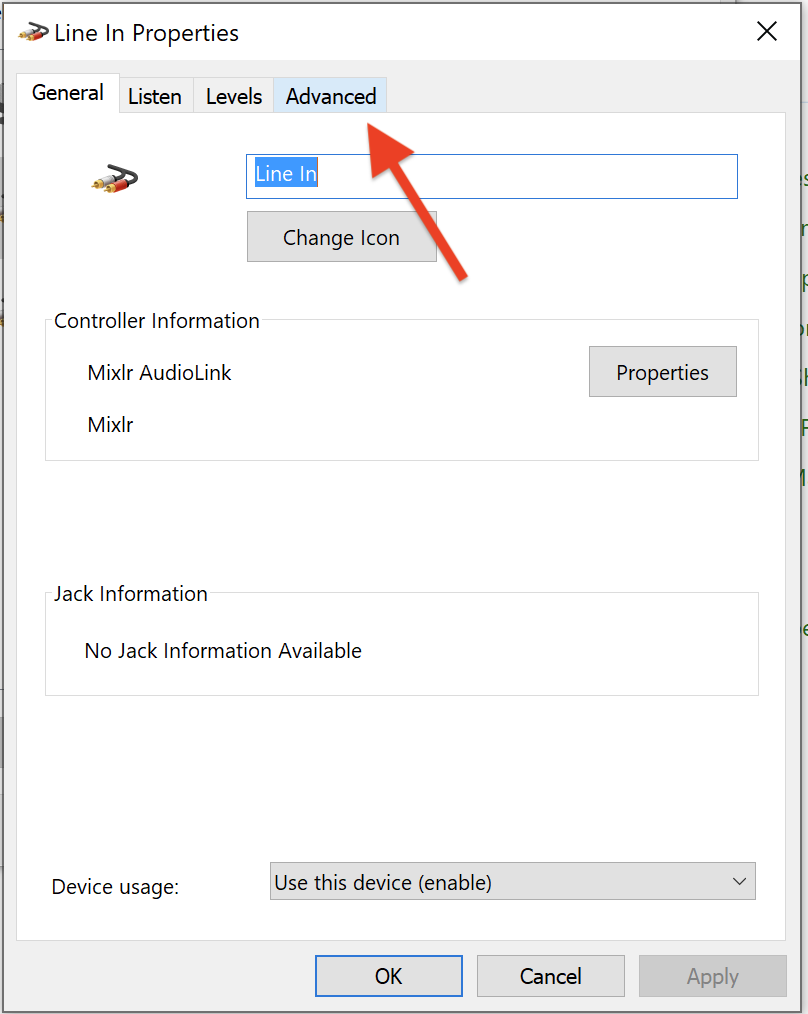
STEP 6c
In the properties window, select the “Advanced” tab.
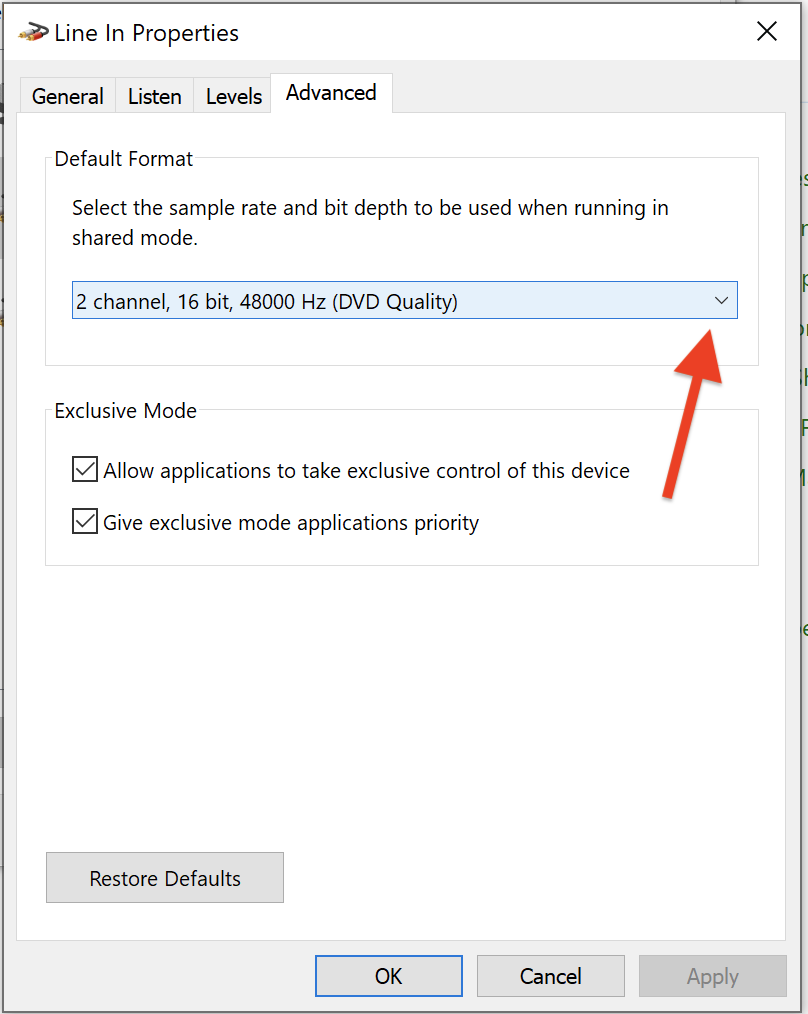
STEP 6d
Click on the drop down arrow to reveal sample rate and bit depth options.
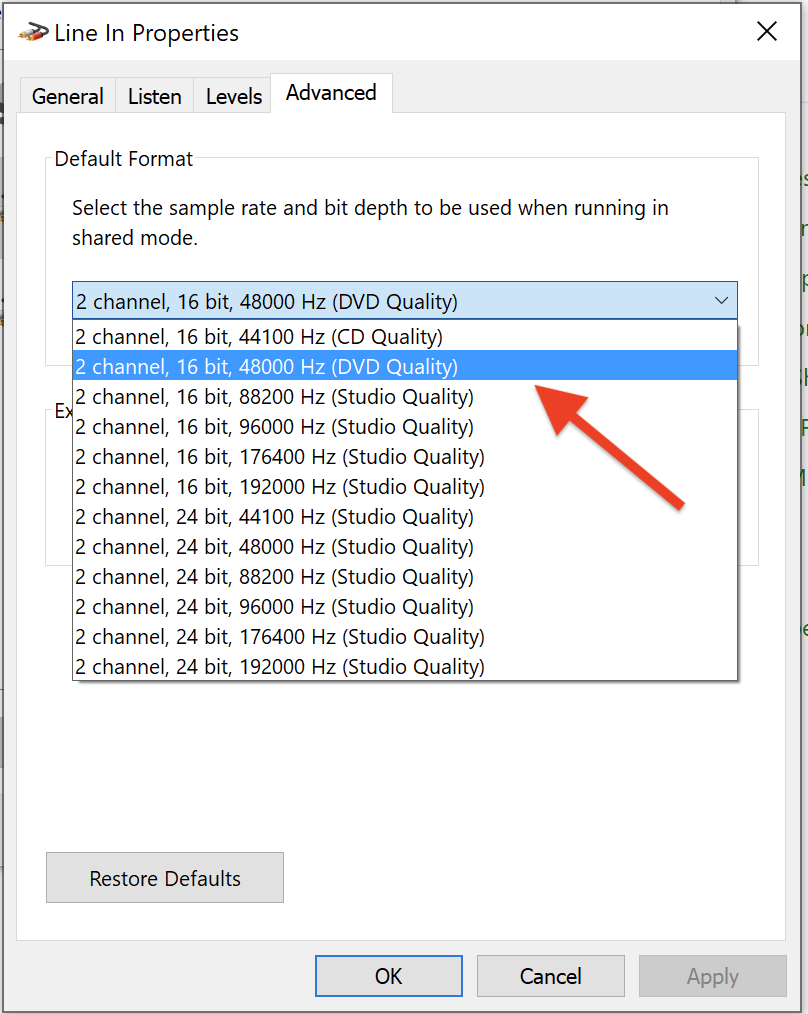
STEP 6e
From the list of available sample rates and bit depths, select “16 bit, 48000 Hz (DVD Quality)”.
Adjust Recording settings for Microphone high-definition audio device
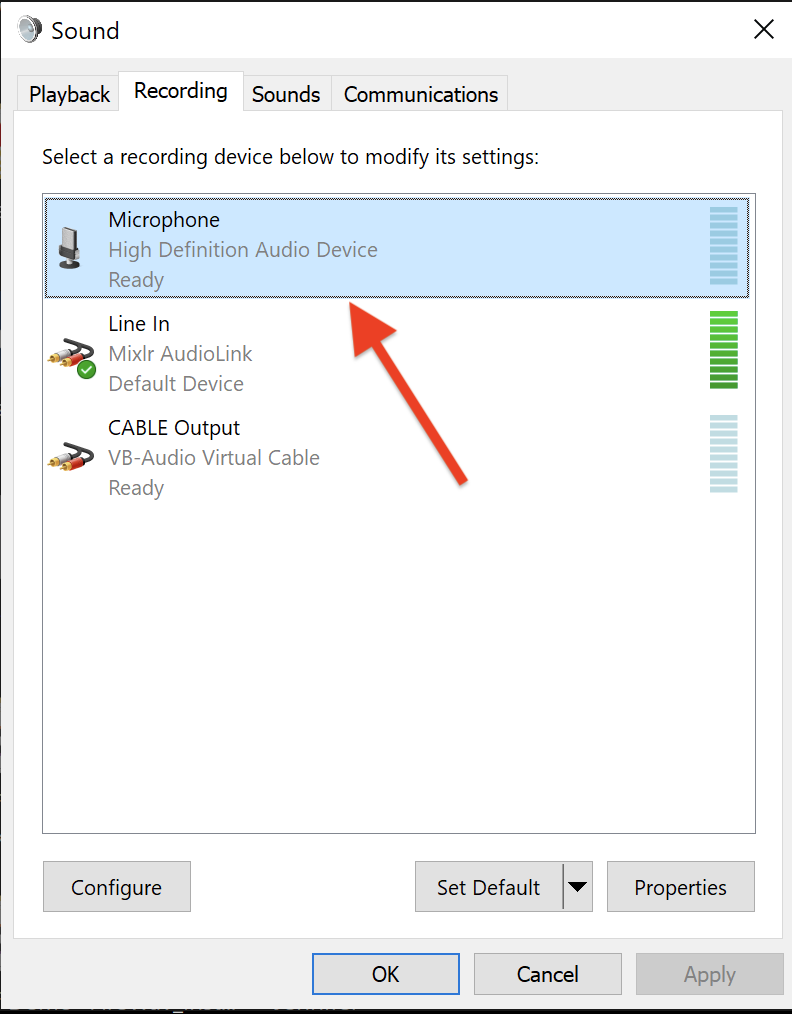
STEP 7a
Once again, navigate back to the “Recording” tab and select “High Definition Audio Device”.
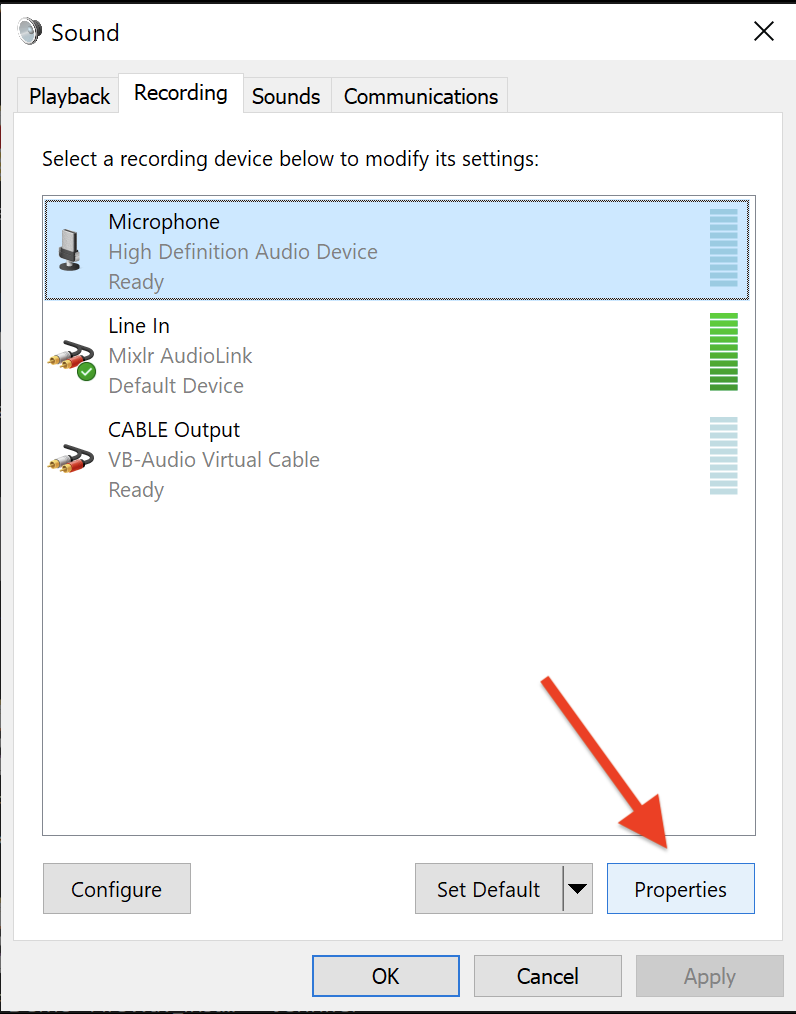
STEP 7b
Select Properties
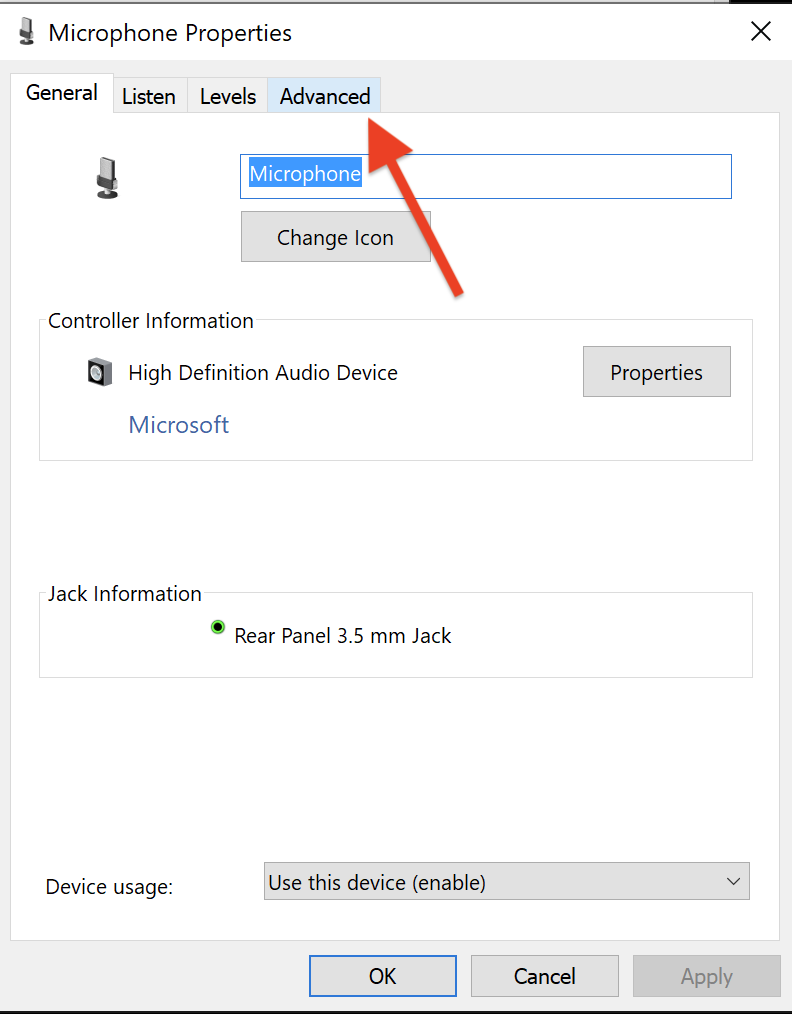
STEP 7c
In the properties window, select the “Advanced” tab.
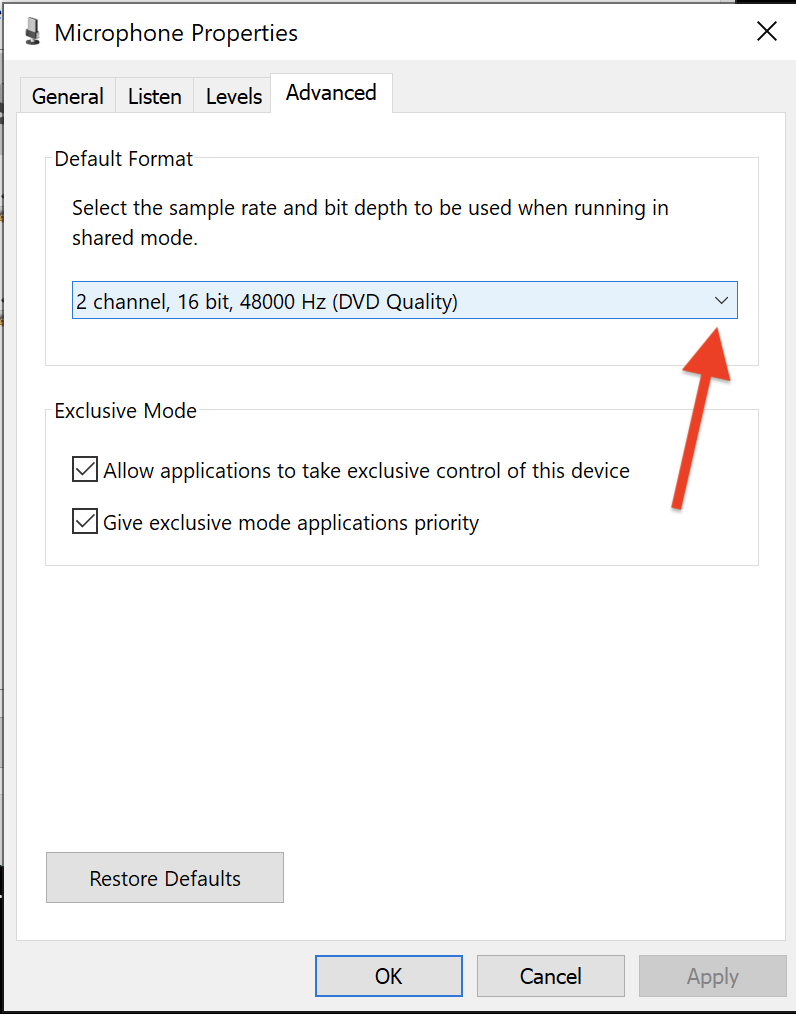
STEP 7d
Click on the drop down arrow to reveal sample rate and bit depth options.
STEP 7e
From the list of available sample rates and bit depths, select “16 bit, 48000 Hz (DVD Quality)”.
Close Sound Settings and Control Panel, Open and Set FireWav App Settings
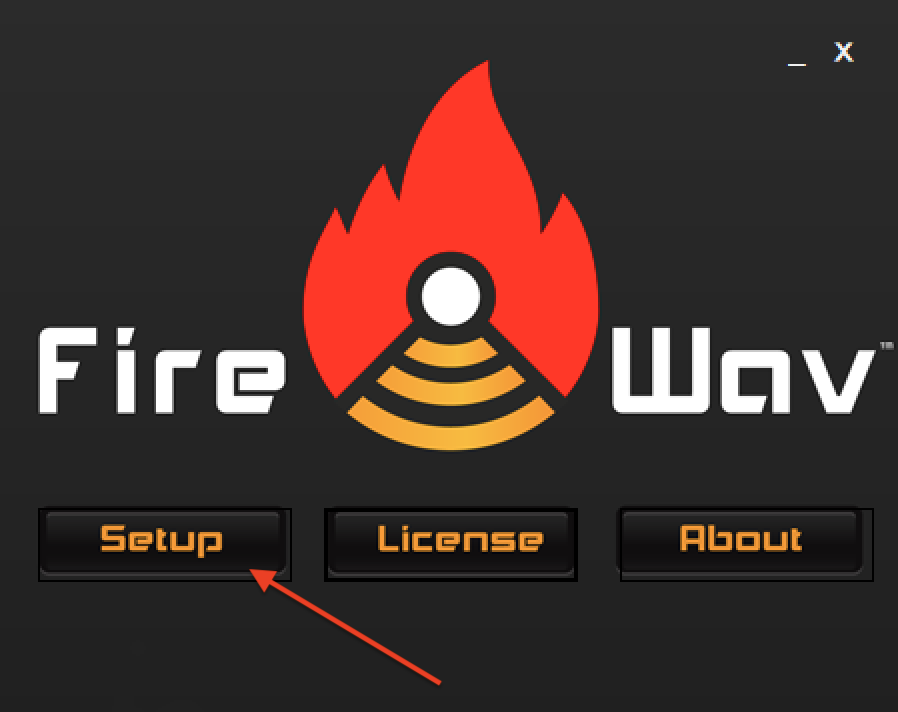
STEP 8a
Now that all playback and recording sound devices are set to the same sample rate and bit depth, open the FireWav app by clicking the icon in the system tray and click “Setup”.
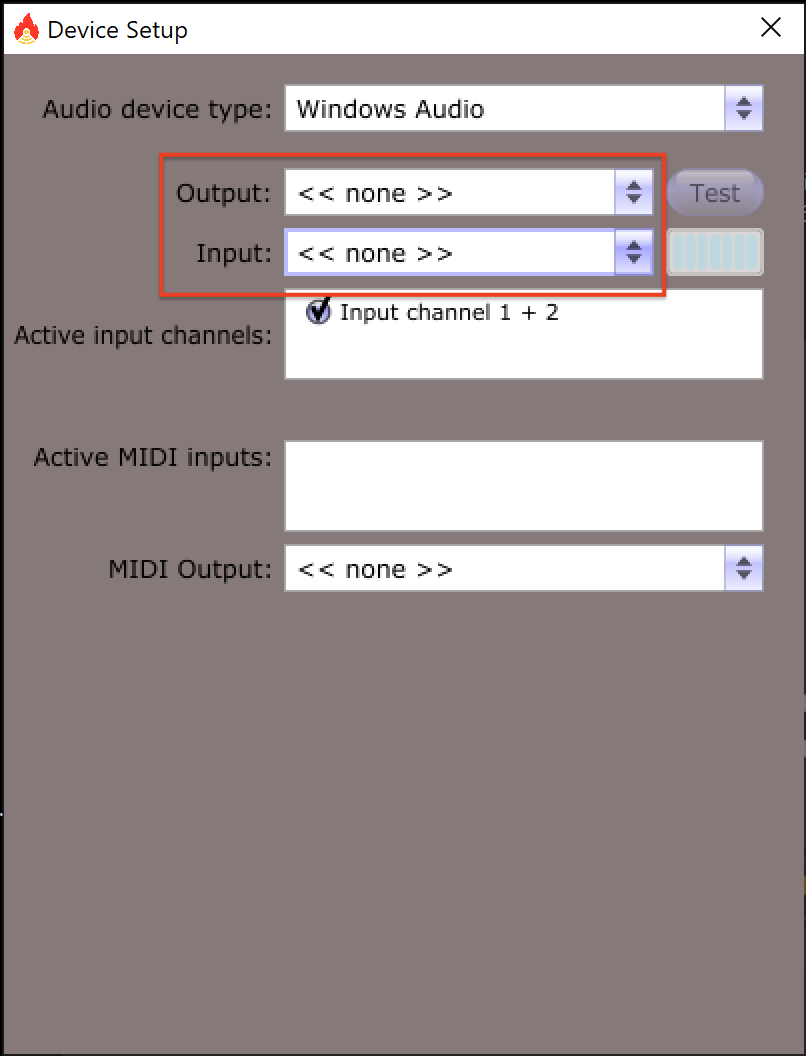
STEP 8b
With the setup window open, the audio devices can be selected. Set audio device type (top) to “Windows Audio”.
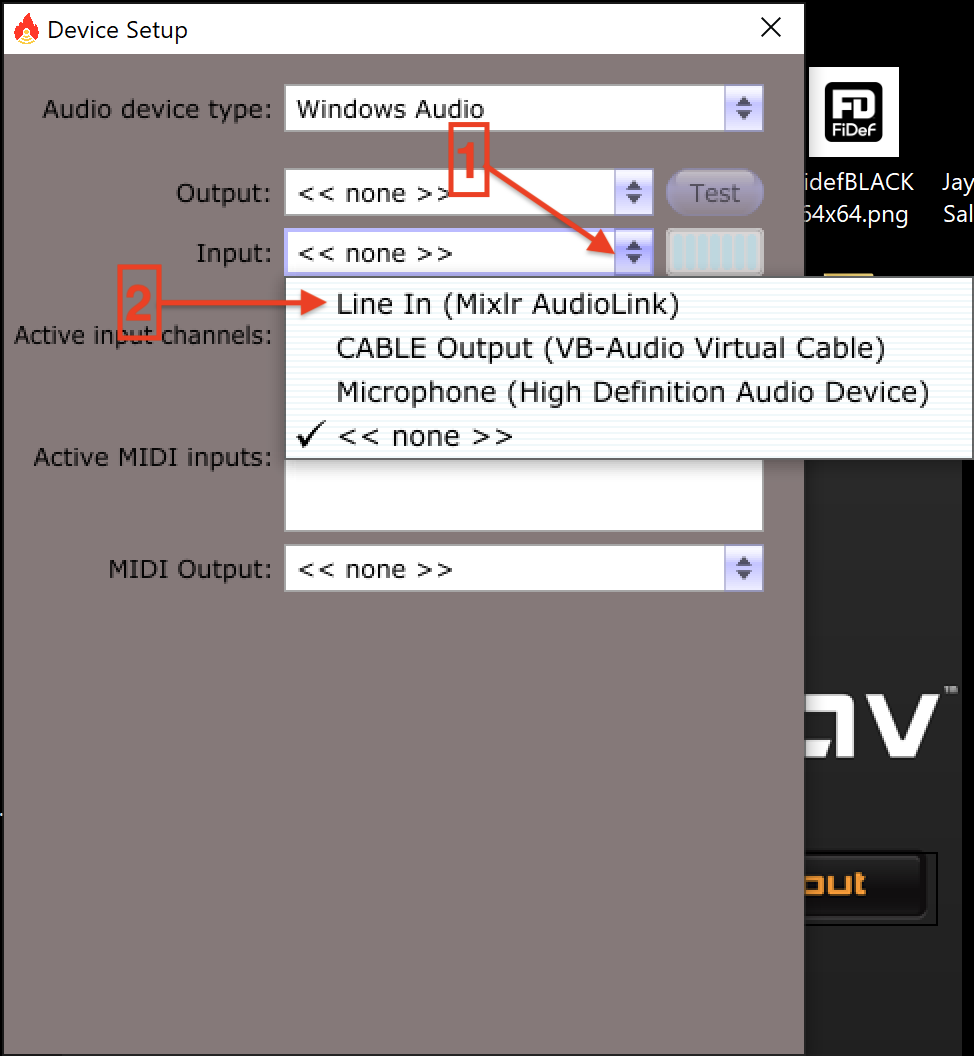
STEP 8c
Set the Input [1] to the new recording device called “Line In (Mixlr AudioLink)” [2].

STEP 8d
You should now see “Line In (Mixlr AudioLink)” in the input box and ” Input channel 1 + 2″ in the Active input channels box.
STEP 8e
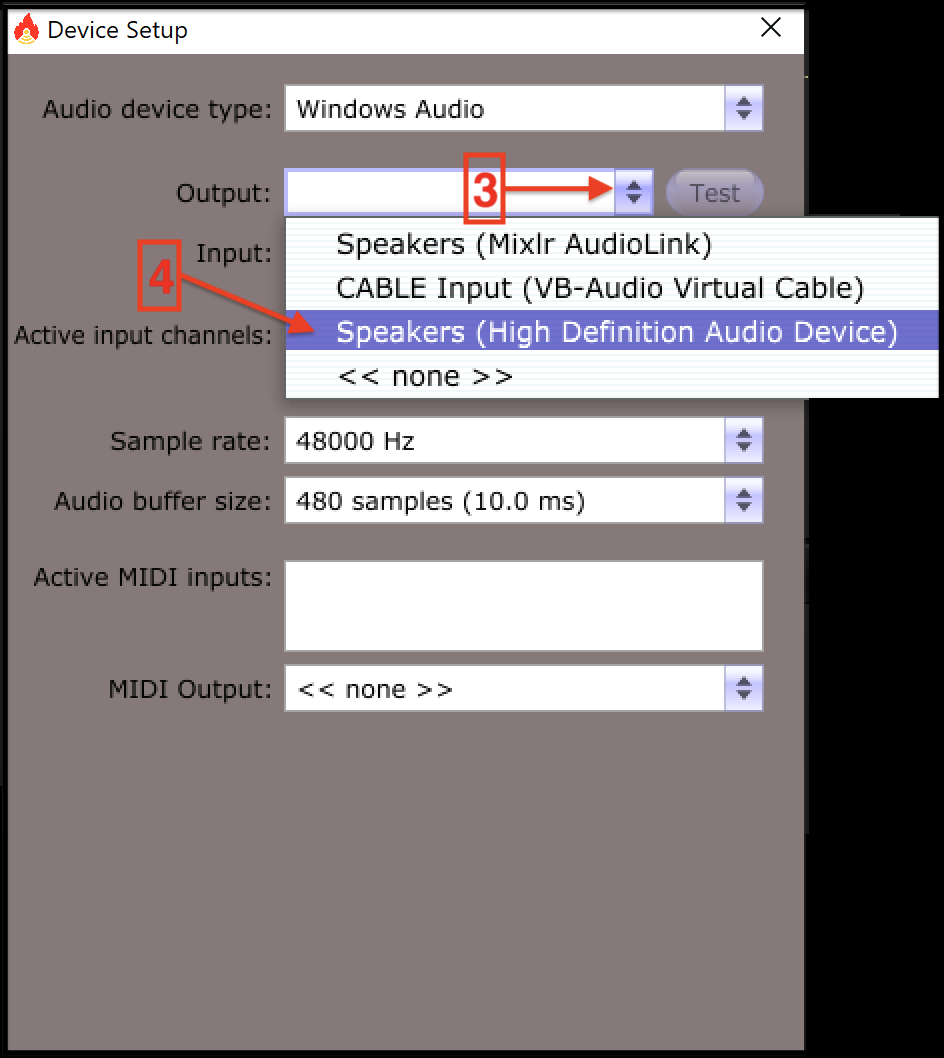
Set the Output [3] to the new recording device called Speakers (High Definition Audio Device) [4], or choose the audio device or headphones of your choice.
STEP 8f
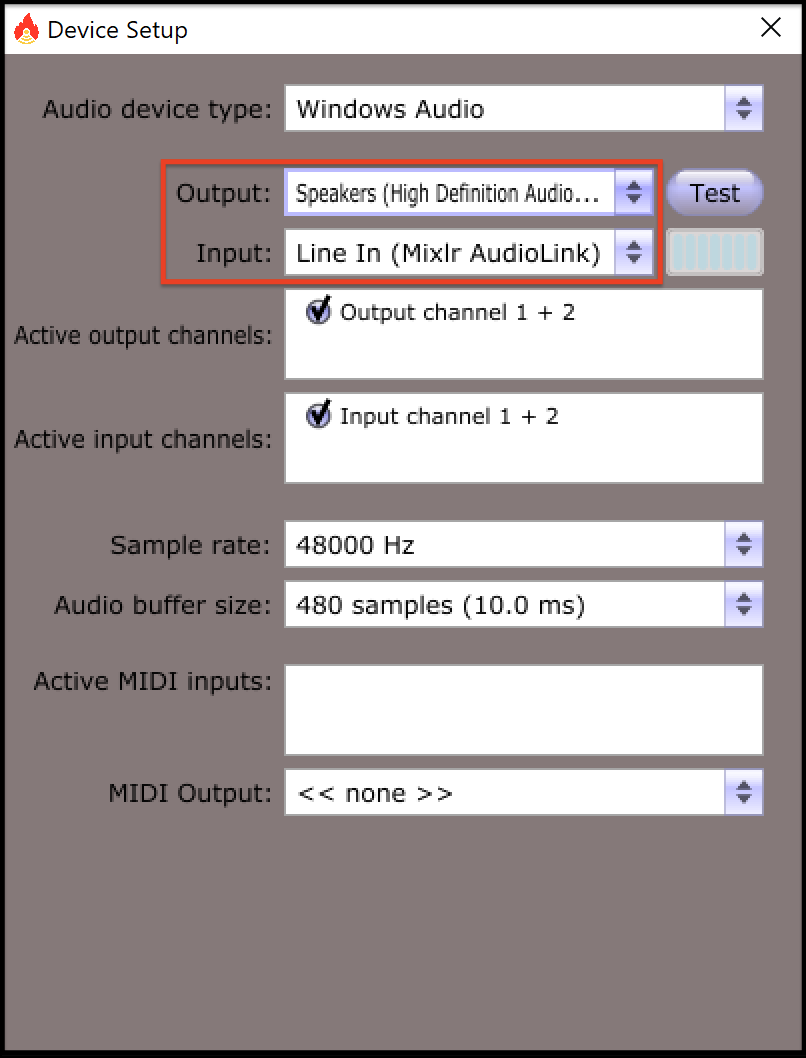
You should now see “Speakers (High Definition Audio…”, or your headphones, in the Output box and “Output channel 1 + 2” in the Active output channels box and “Line In (Mixlr AudioLink)” in the Input box and “Input channel 1 + 2” in the Active Input channels box.
© 2026 Fideliquest Inc.